Tagged amigurumi

Abby The Horse Amigurumi Pattern

This amigurumi pattern took me a lot of time.  I wanted to make a crocheted horse that would match Barbie’s proportions but then I realized that it would have to be really big! So that final version is actually more a pony that a horse. But you can always use thicker yarn and bigger hook to make a “real” horse for your doll.

Abby The Horse Amigurumi Pattern, seamless crochet pony

This amigurumi horse can be done almost seamlessly. Only ears and the mane need to be sewed to the body. The pattern itself is a challenge even for experienced crafters (actually, it is challenging even for me) – you really need to focus if you want it to be pretty and symmetrical!

Abby The Horse Amigurumi Pattern

The doll on pictures is Momoko – she is slightly shorter than a regular Barbie.

The pattern is already available in my shops:

Abby The Horse Amigurumi Seamless Pattern, crochet art button craft

Share on FacebookPin on PinterestShare on TumblrTweet about this on TwitterShare on StumbleUponFlattr the authorShare on Google+Print this pageEmail this to someone

Celestia (My Little Pony) Free Amigurumi Pattern Modification – part 2 (EYES)

Celestia (My Little Pony) Free Amigurumi Pattern Modification

PART I of the tutorial is available here.

PART III (Mane & Tail) is also available.

Today I will show you how to make Celestia’s eyes.

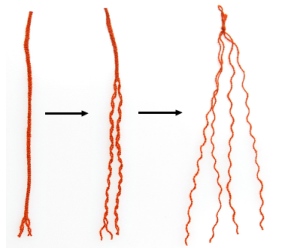
Eyes should be crocheted with thread which is 4 times thinner than the thread used for the body. I use YarnArt Jeans for the body and it is a yarn that can be untwisted into four thinner threads so I just untwist it and use a single thread.

untwisting


This is how I make both eyes:

Celestia (My Little Pony) Free Amigurumi Pattern Modification


Start with a magic ring and make the first row in black, the second and third in purple, and the fourth in white. Leave long thread ends (you will need them to sew eyes to the head).

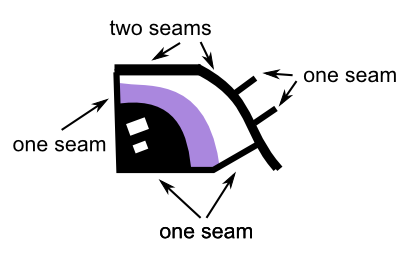
After you finish both eyes, use white thread end to embroider white highlights. Then sew eyes to Celestia’s head and embroider black borders and eyelashes as shown in picture below. The borders should be embroidered with a full-thick thread. Check the chart below to see where the seams should go.

Celestia (My Little Pony) Free Amigurumi Pattern Modification

Celestia (My Little Pony) Free Amigurumi Pattern Modification EYES


Aaaaand the eyes are done 🙂

Share on FacebookPin on PinterestShare on TumblrTweet about this on TwitterShare on StumbleUponFlattr the authorShare on Google+Print this pageEmail this to someone

Seamless Baby Boys/Toddlers Amigurumi Pattern

Oh hi, Ma! Of course we’ve been very good boys all morning! Vase? What broken vase? We don’t know anything about it, Ma!

Seamless Toddler Doll Amigurumi Pattern

Meet those two super cute little amigurumi toddlers. They look sweet, but do not trust those innocent eyes. Once you invite them, not a single biscuit in your house remains safe!

Seamless Toddler Doll Amigurumi Pattern,

Both baby dolls are seamless (except for the eyes which need to be sewed to the face) and fast to make. I wanted the body shape to be as realistic as possible and simple at the same time so that it could be easily altered.

The crochet pattern for the dolls is available in my shops:

button rav button craft

Share on FacebookPin on PinterestShare on TumblrTweet about this on TwitterShare on StumbleUponFlattr the authorShare on Google+Print this pageEmail this to someone
Rudolph The Rednosed Reindeer Free Amigurumi Pattern Modification

Rudolph The Red-Nosed Reindeer Free Amigurumi Pattern Modification

Today I would like to show you how to make your own seamless Rudolph The Red-Nosed Reindeer. I think that he will make a great Chrismas decoration this season!

rudolph the rednosed reindeer free amigurumi pattern modification

What you need

1. This is not a separate pattern, but a pattern modification, so you will need my Andy The Fawn Amigurumi Pattern, which can be purchased on Etsy, Ravelry or Craftsy.

2. Sport yarn in brown, beige, white, black and red (I use YarnArt Jeans).

3. Crochet hook (I use 1.75 steel hook, it is American 4).

4. Tapestry needle

5. Some stuffing

Body

The base (the head, body, tail and all legs) should be made according to the Fawn pattern, but with all the alterations listed below:

1. Use brown yarn instead of orange (read the “Or” symbol as “change to brown”).

2. Use beige yarn instead of white (read the “Wh” symbol as “change to beige”).

3. Round 11 of the HEAD pattern should be done like this:

sc 21 (in brown), inc (in beige), inc 2 (in red), inc, sc (in beige), sc 21 (in brown)

4. Do not make eyes yet.

The finished body should look like this:

Rudolph The Rednosed Reindeer Free Amigurumi Pattern Modification

Antlers

Make two shorter beige pieces following the pattern below:

1) magic ring, sc 4

2-5) sc 4

Fasten off with long thread.

Then make two longer beige pieces following the pattern below:

1) magic ring, sc 4

2-8) sc 4

Fasten off with long thread.

Sew the shorter piece to the longer piece as shown in the picture. Repeat with the remaing two pieces.

Rudolph The Rednosed Reindeer Free Amigurumi Pattern Modification

EYES

Make two eyes following the pattern below. Start with black thread.

1) magic ring, sc 6, change color to white

2) sl-tbl, inc-tbl 2, sl-tbl

Fasten off leaving long black and white ends. You can also tide together and then trim the short beginnings of white and black thread.

Use the white thread to embroider a white highlight in the middle of the black part of the eye.

Sew both eyes to the head as shown in the picture. Use the black thread to sew the black part of the eye and the white thread to sew the white part.

Sew antlers to the head.

Rudolph The Rednosed Reindeer Free Amigurumi Pattern Modification

Congratulations! You have made your Rudolph!

I would love to see your Rudolph so don’t forget to link to your work in the comment!

Share on FacebookPin on PinterestShare on TumblrTweet about this on TwitterShare on StumbleUponFlattr the authorShare on Google+Print this pageEmail this to someone

Sandy The Cat – Seamless Amigurumi Pattern

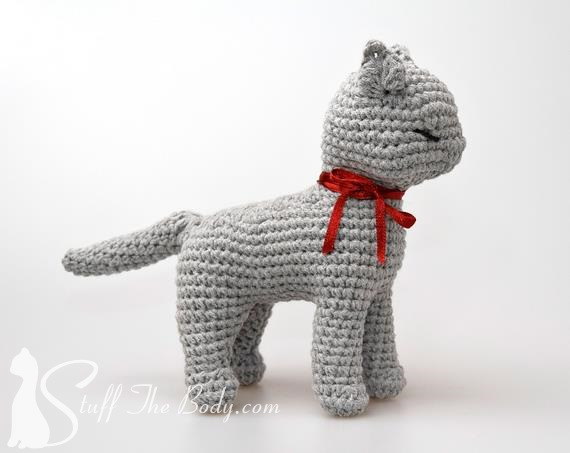
This is Sandy. Sandy is a seamless amigurumi cat that I designed using some advanced shaping techniques which I developed while designing Cat Princess and Andy The Fawn patterns.
sandy the cat seamless amigurumi pattern

wcat3

wcat2

wcat1

I think I am done with crocheting kittens for a long time. I can hardly imagine myself designing anything with higher cuteness factor than Sandy.

Maybe I should go into Halloween/horror stuff for a change?

The pattern is available in my shops:

button rav button craft button et

Share on FacebookPin on PinterestShare on TumblrTweet about this on TwitterShare on StumbleUponFlattr the authorShare on Google+Print this pageEmail this to someone

Easter Bunny with Eggshell Amigurumi Pattern

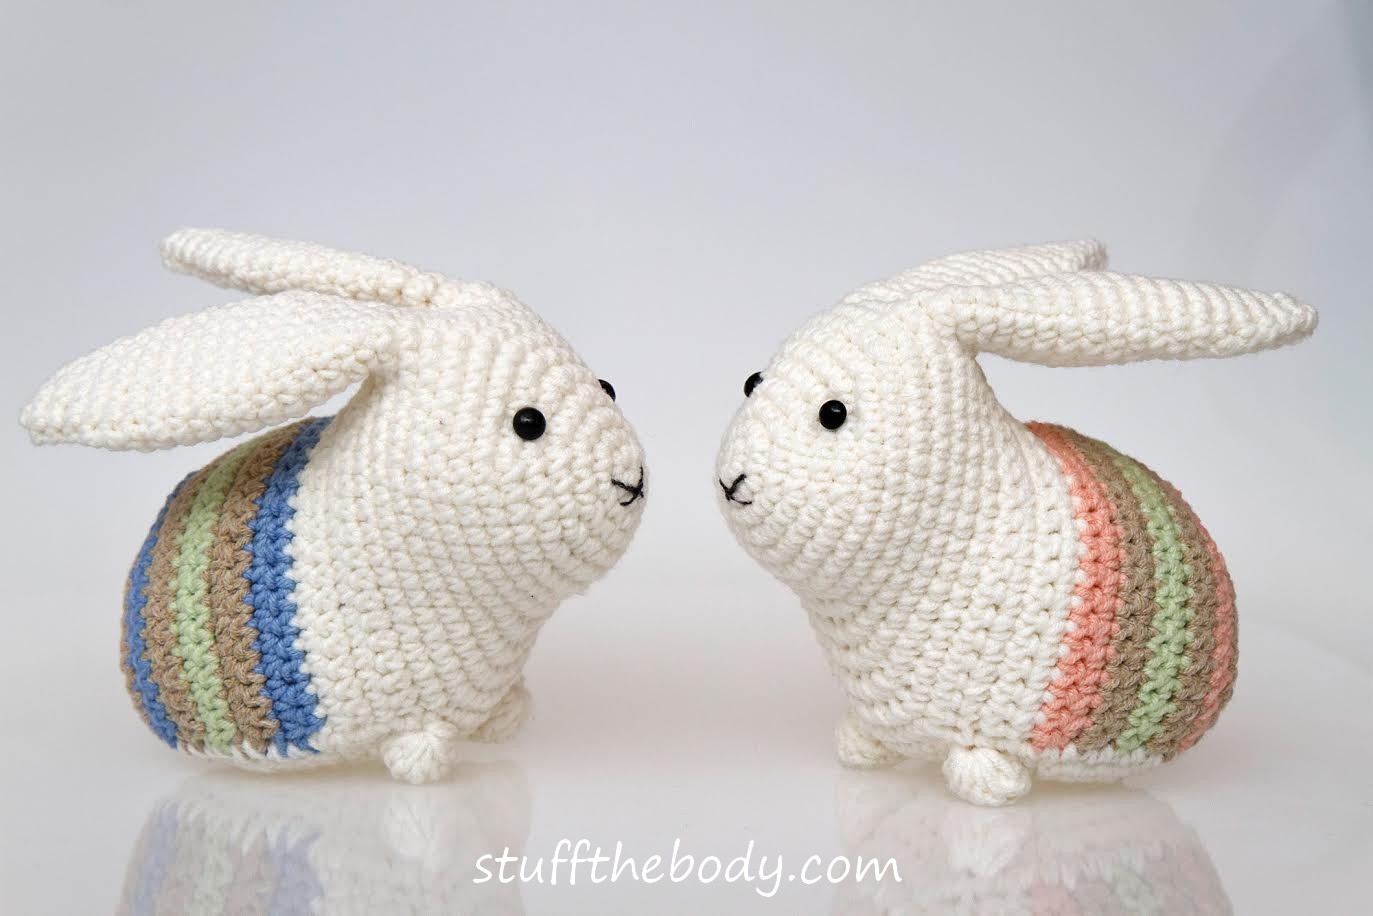
Mrs. Duck was rather surprised when she laid her eggs and they saw they were colorful and striped. And she was even more shocked when she saw what hatched from those eggs!

amigurumi easter spring bunny pattern

Yes, it’s Amigurumi Easter Bunnies. They are colorful and cheerful because the spring has come at last!

They were made from my Easter Bunny Pattern. They are seamless and fast to make. I think they will make a great spring home decoration.

The pattern is quite simple, no dramatic shaping here, so I think that any crochet crafter with an intermediate level of experience will easily make it.

The pattern is available in all my shops (see below), also in an Easter Bundle (with a Lazy Duckling).

button buy on button et button rav button craft

Share on FacebookPin on PinterestShare on TumblrTweet about this on TwitterShare on StumbleUponFlattr the authorShare on Google+Print this pageEmail this to someone